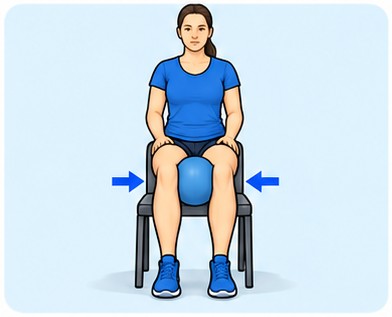
1. Gentle inner thigh squeeze
5 holds of 10–20 seconds.
- Action.
- Sit with feet supported and a soft ball or folded pillow between the knees. Squeeze gently and release.
- Technique.
- Begin with light effort. Keep breathing and avoid a sharp groin pain.
Back Pain Doctor
Back Pain Doctor · Dr Joshua Hatch · backpaindoctor.com.au
Adductor-Related Groin Pain
Progressive rehabilitation and graded return to activity
Before you start
Use this programme for an assessed condition when exercise is appropriate. An acute fracture, tendon rupture, unstable injury or recent operation may need different restrictions. Any specific protection or surgical instructions take priority.
Adductor-related pain arises from inner thigh muscles or their attachment. Assessment should exclude hip, abdominal, inguinal, testicular and bone causes of groin pain.
Build adductor strength and trunk control before lateral and kicking loads.
Mild familiar discomfort up to about 3 out of 10 may be acceptable if steady and movement stays controlled. Sharp or increasing pain is a reason to stop. Pain, swelling and function should return to baseline by the next morning. This is a practical guide, not a proven safety threshold.
Start squeezes gently. Avoid hard stretching, maximal kicking and wide lunges while irritable. A lump, fever or testicular pain needs prompt assessment.
When symptoms increase
Reduce the provoking movement, repetitions or resistance by about one third to one half. Keep other comfortable activity where appropriate. Do not add harder exercise until the response is stable. A sudden major change needs assessment.
Begin with one set if needed. Practise gentle movement daily if it helps; perform strengthening on 2–3 non-consecutive days each week. Rest 30–60 seconds between easy sets. You do not need to force the full dose on the first day.
5 holds of 10–20 seconds.
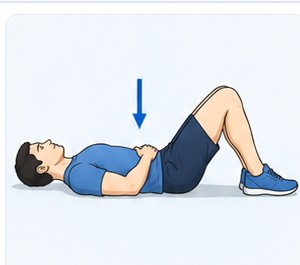
5–10 holds of 5–10 seconds.
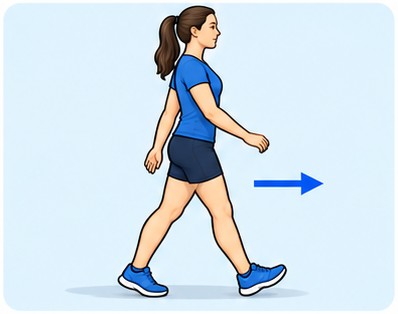
Start with 5–10 minutes, once or twice daily.
Ready for Phase 2
Walking and light muscle work are comfortable on repeated sessions, without limping or a sustained next-day flare.
Start squeezes gently. Avoid hard stretching, maximal kicking and wide lunges while irritable. A lump, fever or testicular pain needs prompt assessment.
Use 2–3 non-consecutive strength days each week and rest 60–120 seconds between sets. Begin with a resistance that leaves a few controlled repetitions in reserve. Add repetitions first, then a small amount of resistance.
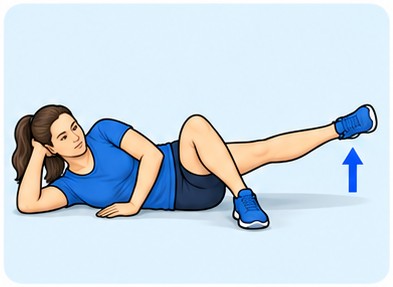
2 sets of 8–12 each side.
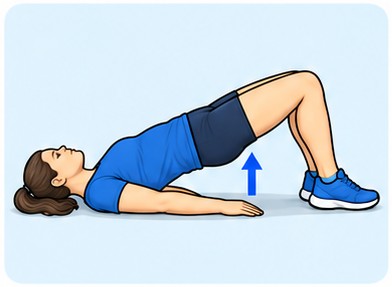
2–3 sets of 8–12.
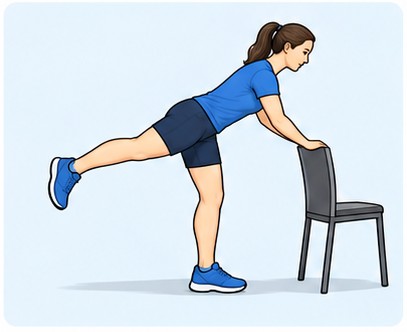
2–3 sets of 8–12.
Ready to add Phase 3
Strength exercises are controlled through a useful range, and ordinary stairs and daily activity are well tolerated.
Build adductor strength and trunk control before lateral and kicking loads. When the top repetition range is easy on several sessions, increase resistance slightly and return to the lower end. Keep the range and movement quality consistent. Avoid increasing weight, repetitions and frequency together.
Continue strength work on 2–3 days weekly. Add one new demand at a time. If impact is part of the programme, allow 48–72 hours between demanding impact sessions initially and reduce the strength volume on those days.
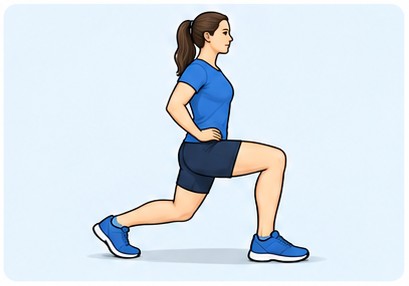
2–3 sets of 8–12 each side.
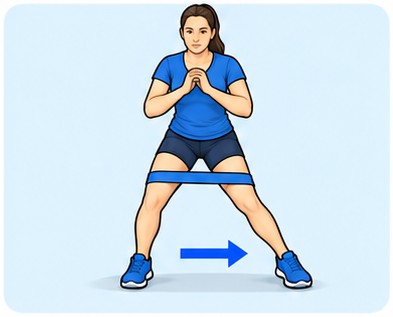
2 sets of 8–12 steps each way.
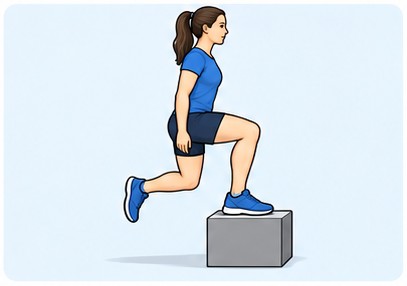
2–3 sets of 8–12 each leg.
Ready to increase real activity
Before running, tolerate a brisk level walk and the required single leg tasks. Faster running, cutting and kicking need deliberate graded exposure; pain relief alone is insufficient.
Progress through running, lateral movement, cutting and kicking before unrestricted field sport. The final stage should reflect the real task: carrying, lifting, stairs, walking, running or sport. You can finish rehabilitation for daily life without needing to complete running or jumping drills that your activity does not require.
Progress through running, lateral movement, cutting and kicking before unrestricted field sport.
| Stage | What to build |
|---|---|
| Everyday function | Use comfortable movement and daily tasks in manageable blocks. Establish a stable next-day response. |
| More demanding activity | Increase duration before adding substantial load, speed, hills or more complex positions. |
| Specific work or sport | Practise the actual task at reduced intensity and duration, then progress it on separate occasions. |
| Full participation | Complete the required activity repeatedly with control and confidence, without a significant next-day flare. Injury-specific clearance may still be needed. |
Use 2–3 non-consecutive strength days, with comfortable mobility or easy activity between them. Start a new activity at less than your usual duration or intensity. Keep harder sessions apart and leave more recovery time when symptoms are still increased. For tendon loading, the condition-specific frequency on the exercise pages takes priority.
After the stated walking, strength and impact checks are met and running is permitted, try 30 seconds of easy jogging followed by 90 seconds of walking, repeated 6–8 times on flat ground. Repeat on 2–3 separate occasions before extending the jogging interval. Leave 48–72 hours between sessions initially. Reduce or stop impact if symptoms increase; shin or bone-related pain should remain pain-free.
Seek prompt assessment for inability to bear weight, a hot red swollen joint, progressive weakness or numbness, a focal bony pain or major new swelling. Sudden calf swelling, chest pain or breathlessness needs urgent assessment. Book reassessment if progress has stalled for 4–6 weeks, function is deteriorating or the same progression repeatedly causes a flare. Do not wait for that interval when a warning symptom is present.
Trial dose
The trial that established exercise for this condition used a long, structured programme, and it worked far better than passive physiotherapy.
A randomised trial of 68 athletes with groin pain for a median of 40 weeks. Active training was compared with physiotherapy that involved no active training. Treatment lasted 8 to 12 weeks.
What it found. Twenty-three athletes in the active training group returned to sport at their previous level without groin pain, against four in the physiotherapy group (odds ratio 12.7, 95% CI 3.4 to 47.2).
Limits. A demanding programme in athletes. Session length and frequency are taken from a later study that reproduced the protocol, not from the original paper.
Result from the trial abstract. Exercises and doses from a study that reproduced the programme (Yousefzadeh, BMJ Open Sport Exerc Med 2018).
How this fits the programme above. The inner thigh squeeze and side-lying lift in this programme are the opening exercises of the trial programme. The trial adds trunk work, balance and sideways movement, at a much higher weekly volume.
A trial result describes what happened to the people in that trial. It does not predict the result for an individual, and a trial programme should be started only after an assessment. Reviewed 13 Nov 2026.
The programme follows current rehabilitation principles. Exercise selection, sets and progression checks are practical starting prescriptions rather than a trial-validated complete protocol.
Dr Joshua Hatch | The Back Pain Doctor. Handout prepared 1 Nov 2026.